Wednesday, December 11, 2013

Finger Painting Scrapbook Page

Today I would like to share with you two of my favourite ever scrapbook pages.  I created these pages with some photo's I have had for a while of my daughter when she was a bit younger, finger painting (mostly herself I might add lol)

It turned out so bright & colourful, I just love it!!

I started with 2 pieces of white textured card stock then went to town stamping with multiple colours & using 2 of MFT's stamp sets Abstract Art & Jumbo Abstract Art.  I LOVE how it turned out.


Here is a close up of each individual page.  It was really hard to photograph as there was always a light shining off something shiny lol


I then cut out some huge splats using an old Quickutz die set that I have had for ages & not used, stamped them with another MFT stamp set I had called Clearly Sentimental About Art & coated them with UTEE to make them all shiny like real paint splats.  The gorgeous little paint brushes are also from MFT & I cut a wavy strip of different colour for the end to make it look like they had been dipped in paint & I used UTEE on them too for that shine.


The sentiments went perfectly with the page!!


With the last one, I used it to write the date on first & how old she was.


 Thanks for looking & I hope you like my Scrapbook pages as much as I do.  A bit of extra colour for you day  :)


Friday, December 6, 2013

MFT Card Sketch 153

I have another card for you today following along with MFT card sketch 153, which looks like this


I decided with this one that I would make a card for my Mum for Christmas & her favourite colour is Purple so I got started finding some purple papers to use.  This is how it turned out


I had a Christmas paper pack that had lots of Pinks & Purples in it, which worked perfectly for this card.  It was called Whimsical Christmas Basics by Fancheville & I have had it for a very long time, it has some really great patterned papers in it, some that can be used for any occasion.

The MFT dies that I used were Pierced Square Stax for the 4 small panels on the front, Pierced Rectangle Stax that I cut the middle darker purple piece from, Wonky Scallop Border down the left hand side, Blueprints 3 for the sentiment strip & the stamped sentiment was also from MFT called Clearly Sentimental about Christmas.

I used a Cuttlebug embossing folder to emboss each little square with some Christmas tree's, a button from my ever growing stash of buttons & some twine on the button.

It turned out well & I think my mum is going to love it (at least the colour anyway lol)


Thanks for stopping by  :)

Thursday, November 21, 2013

MFT Card Sketch 151

Today I completed a card that I made following MFT Card sketch 151 which looks like this


Every week I have good intentions on completing the card sketch & just somehow run out of time before the next one is out lol  So this time, I got onto it right away!!


So this is what my card looks like


I used the gorgeous little PI stamp Butterfly Kisses from MFT that I stamped onto a circle cut from the Pierced Circle STAX.  I paper pieced her outfit with some patterned paper & the wings with a very shiny piece of wrapping paper I had.  I was going to colour her with copics, but I thought that she looked better as she is with the white background, it just gives it a nice effect without too much other colour added.  I did colour in the small flower in her hair with a hot pink, to make it stand out more.

The background was die cut using an MFT die called Flying Butterflies which are just so cute!!  I inked around the edges with VersaColor Orchid, then used a clear embossing powder that had a crystal glitter in it.  You may not be able to tell from the photo, but the edges are very sparkly & shiny.  I also did the same on the edges of the butterfly, which was cut from an MFT die set called Butterflies, a 3 piece die set.  The Butterfly Wishes is a stamp from the Winged Beauties set, which is embossed with a glitter embossing powder also.


I popped the image circle up with foam dots & glued the butterfly onto the edge & raised the wings a little to make it look like it is flying, here is a close up 


I hope you like my card & I am hoping to start following along with more MFT card sketches.  As you can see, I LOVE MFT & have lots & lots of their stamps & dies to play with  :)


Thanks for stopping by


Sunday, November 3, 2013

Hello Kitty Cards

Hi again :)  Tonight I am going to show you 2 cards I completed this weekend that are not Christmas cards!

The 1st Card I made using my Fairy Hello Kitty Sizzix die cutter.  I used some lace down the side & cut a pierced tag from MFT, punched a hole & put a small eyelet in it with some twine, then used a foam dot to make it pop off the card.


The 2nd card I used my Hello Kitty Bee Sizzix die cutter.  The grass & banner at the top were cut using MFT dies & the sentiment was also from an MFT stamp set which happened to go perfectly with this card!!  I used a couple of little flower brads I had & some paper flowers down the bottom to give it some extra colour & dimension.  The pieces of grass are bent down a bit to give it a 3D look also.


That was the 1st time I had actually used my Hello Kitty dies & I have had them for a very long time lol  I think these 2 cards turned out well & I hope you like them.

Thanks for looking :)

Copic coloured Christmas Cards

I have 2 last Christmas Cards to show you this morning that I made last week, then I am up to date with posting Christmas cards!!

The 1st one is my favourite card so far.  I am still learning how to colour with copics & it is quite frustrating when I watch all these you tube videos of people colouring & it looks so easy & then I try & it looks nothing like it should, so I think this one turned out pretty well  for one of my very first copic coloured images.  The gorgeous image is a digital image from Wee Stamps & I just love it.  After I coloured it in, I cut out a frame from a glitter paper to put around it & stamped the Merry Christmas on a die cut washi tape from MFT.  I also stamped the washi tape die cut with a little Holly stamp I had before I stamped the Merry Christmas onto it, then inked the edges just a little with a bottle green ink.


The last card I have for you is also coloured with copics & is another gorgeous little digital image, but this one is from Stampfairy.  This one was a bit of a challenge because I hadn't tried colouring white with the grey shadows & red is a very hard colour to work with.  My first image I ruined because the red ran into the white section, so I had to be very careful with my next attempt, but I think it came out pretty well in the end.

I used some mulberry paper under the image that I had wet & teared to give it the hairy edges.  The tab on the side was cut using an MFT die & the Merry Christmas stamp was also from MFT which is new & I love the writing!  I added a little bit of glitter to her bows & the present, just to give it a bit of sparkle & also added some rhinestones to the corners.  The little wooden Christmas tree on the bottom was another from my ever growing stash of craft bits & pieces lol


Thanks for looking & I hope you like my new additions :)

3 Christmas Cards

Good morning everyone :)  Today I have a few more Christmas cards to show you that I had actually done a few weeks ago.

The 1st one I made using the cute Daii Dragon, cut from a custom made die cutter that I have in my collection.  I love this die cut, as you can make it hold just about anything depending on the card you are making, so for my Christmas Card, I have him holding a stocking & I also added a Santa hat.


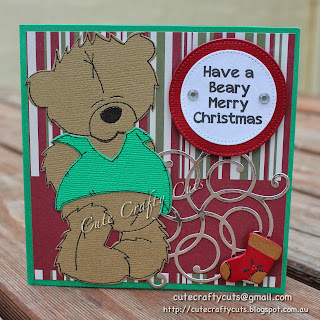
The 2nd card I made using the gorgeous Carla Bear & the pretty swirly die cut in the background was cut from an MFT die which is so pretty.  I cut it in a shiny silver card, but it is a little hard to tell from the photo.  The little stocking in the bottom corner is a wooden shape I have had for many many years hidden away, it's time to start using everything I have been collecting!


The 3rd card I am showing you today is using one of my favourites, Jodie Bear.  I have also used the same swirly MFT die in the background, but this time I cut it from a green glitter card stock.  The star strip on the left was also cut using an MFT die, then I wrapped some twine around it & added a little red bow.


I hope you like my cards this morning & I hope you all have a great day (or night).
Thanks for looking :)

Wednesday, October 30, 2013

Baby's 1st Christmas Cards

Hello everyone, I have a couple more Christmas cards for you today which would both make great Baby's 1st Christmas Cards.

The 1st one is the Pink one for a little girl, using the gorgeous Upsy Daisy with a pink Santa hat & teddy.  I cut the bauble from metallic card & stuck the Merry Christmas sentiment on it.  I embossed the Merry Christmas with Silver embossing powder to match the metallic silver bauble & finished off the card with some pale pink ribbon around the middle.


The 2nd one is the boy version, which is basically the same except using different colours.


I hope you like them :)  Thanks for looking!!

Tuesday, October 29, 2013

More Christmas Cards

Ok, I have a few more cards for you tonight.

The 1st one is using the gorgeous Bambino Bear & the cute little doily circle is from MFT.  The Christmas paper in the background was from a paper stack, which I inked around the edges, then I used 3 buttons in the corner just to finish it off.


The 2nd card tonight is the gorgeous Oscar Bear, which was cut using a custom made die cutter, one of my favourite bears!!  The present was also cut using another custom made die cutter & the pierced circle is from MFT.


My last card for tonight uses Carla Bear, who is also very cute!  This one uses 2 dies from MFT, the tree's & the pierced tag.  I used an embossing powder that I have had for many many years & hadn't actually used before & now it is one of my favourites!  It's funny how much stuff I have bought over the years & haven't actually used, but I don't think I am the only one who does this am I??  Anyway, I used some twine at the top of the tag & also along the bottom of the tree's, then added a couple of small green rhinestones to the top corners just to give it a bit of extra sparkle.


I hope you like my cards.  Thanks for looking :)

Monday, October 28, 2013

Christmas Cards

Well I have finally got a few more Christmas cards made, yay!!

The first one I made using a new Merry Christmas stamp & new tree's dies from MFT.  I put foam dots behind the front layer of tree's to hold them off the page & give it a 3D look & also used some twine around the bottom.  The labels are also from MFT.


The 2nd card tonight I made using one of my gorgeous bear die cuts Upsy Daisy & added some antlers & a red nose to make him a reindeer.  I then cut a stocking & a present & added a Merry Christmas sentiment to a bauble that I cut from metallic card.  The paper in the background is cut from a piece of scrapbook paper that I have had in my stash.


I will add my other cards very soon, but tonight my internet is not cooperating & is going too slow to add anymore.

Thanks for looking :)

Tuesday, October 8, 2013

Christmas Card

I have another card to show you tonight, one more Christmas card to add to my list, yay :)

I used another gorgeous little girl from Lori Designs & coloured her with copics.  I also used dies from MFT, Quickutz & spellbinders.


I popped the top present up with a foam dot to give it a 3D effect, also the Merry Christmas sentiment & I stapled on some gold stars I had in my ribbon stash.

I hope you like her as much as I do :)  Thanks for looking!

Birthday Card

I thought I would make this little girl from Lori Designs, into a Birthday Card as she looked like she had her party dress on & nice big bow in her hair.


I used some very sparkly blue paper behind her & the Happy Birthday sentiment which looks a lot shinier in real life than I could capture in the photo & the swirl behind, from MFT, is glitter too.  I also used a glitter embossing powder on the Happy Birthday.

There are many more of Lori's designs that I want to get creating with, now just to find the time!

Christmas Card

Another Christmas Card done to add to my collection.  I am having a stall at a fete at my daughter's Primary School in November & I have LOTS more cards to make, so I had better get a move on hadn't I?!!

This gorgeous little girl is a digi stamp from Di's Digi Stamps, which I coloured with Copics & paper pieced her dress.


The little loops at the top are from a MFT border die & the present & holly are from custom made die cutters.  I inked the edges with some green & used twine along the top & bottom of the card.


Here is a close up of the present, cut out of a shiny metallic card stock which is quite hard to photograph unless it is in the right light at the right angle.


I hope you like it :)

Wednesday, September 18, 2013

1st Christmas Card made for 2013

So, with Christmas very quickly creeping up on us, I thought I had better start getting my Christmas cards done so I was busy making this one today.  I am also just learning how to use my copic markers & all of the you tube video's make it look so easy!!  I can only wish I was that talented, but I guess practice make perfect (or so they say lol)

Well here is my finished product, using a C.C Designs stamp & she is just so gorgeous that I couldn't resist.


I don't think my colouring skills were too bad, but I do definitely need to keep practising!!  It is fun & kind of frustrating at the same time, because I have been watching so many you tube video's on how to colour skin & hair & they all look so good.

Anyway, I used a Sizzix die for the Clock hiding in the background & as always, my favourite dies from "My Favourite Things".  The "Merry Christmas" is also from "My Favourite Things".  I used some tulle & tied them into bows, some paper flowers I had in my huge ever growing stash of embellishments & some liquid pearls just to add a little bit of shine & sparkle & to give it a few finishing touches.

I am very happy with the way this card turned out & I hope you like it too.

Monday, August 5, 2013

You Rock My World

My card tonight is different than the ones I usually make.  I actually made this card just before Valentines Day & did a few different varieties & colours & sold most of them, so they were definitely popular.


The stamp was from a My Favourite Things set, which is just great, it had so many good stamps to use.
I inked all the edges to give them a worn in look & not look so plain.  The Guitar was stuck on using foam dots to give it a raised 3D look, to make it pop off the card a little.

I hope you like it as much as I do

Thanks for looking !!

I Love Being Your Mum

Tonights card was made using another gorgeous stamp from My Favourite Things, I just love this little girl!!  I have many different stamps in the Pure Innocence range, but I especially love the ones that are easy to paper piece like this little cutie.


Her dress is paper pieced & I coloured the rest with copic markers.  I had the ribbon that I wanted to use on a card, so I matched the colours with it & worked around what I had.  As it happens, they were my favourite colours anyway.

Thursday, July 25, 2013

I Love you, Mum

How cute is this little girl from the Pure Innocence range of stamps from My Favourite Things?!  She is so adorable & was fun to make up.  The zig zag along the side is also from My Favourite Things.

The button embossing folder was new to my collection, so I just had to try it out!


I added some tiny little pearls to her necklace, a rhinestone to her hat & handbag & some glitter to her scarf.


The dress & hat were paper pieced & I used copics to colour the rest.

She's just so adorable.


Monday, July 22, 2013

Butterflies for Mum

Butterflies have got to be one of my favourite things, they are just so pretty.  I used a die set from My Favourite Things, which comes with 3 different sizes.   They are great because just by folding up the wings a little, you can make them look 3D, like they are about to fly off the page. The swirly die cut behind the Butterflies is another My Favourite Things die & the 'Mum' phrase is cut from a custom made die cutter.


This card can be used for any occasion for Mum & could be made from any colour combinations & still look just as pretty.

Thursday, July 18, 2013

Dad's Birthday Card

This is a card I made for my Dad a little while ago which I love.  I used a new technique I was playing around with at the time, Bottle Caps.  They are so much fun & I don't know how I didn't know about these a long time ago!


I hammered some bottle caps, so they flattened out & the edges rolled up & made them sit flat & smooth.  Then I cut out some letters using a Sizzix Alphabet, punched out some red circles & glued all the bits in & used some resin I had mixed up to put on top to seal them & give them a great shine.

The cute little Tools were cut using an MFT die that I had recently bought & the stamped image was also from MFT.  The tag was chipboard that I had inked the edges of, to give it an older/dirtier look, which went well with the card theme & to finish it off, I used some eyelets in the corners.

I love how it turned out & it was well worth all the work.

Mum's Birthday Card

This is one I made for my Mum's birthday a few weeks ago. Her favorite colour is purple, so I always make her cards with lots of purples.


I used MFT die's for the pocket & the white glitter swirls with leaves just behind it & the 5's were cut using Sizzix Shadow Box numbers. The flowers were just some paper ones I had bought a while ago that I had in my ever growing stash & I added some glitter to them & rhinestones, for some extra sparkle.


The pocket not only looks good on the front, but also doubled as a great little pocket for my gift card!  I used foam tape around the edges of the pocket so it was raised & also made it easier to get the gift card in & out.


I even wrapped the gift card in purple paper :)


Wednesday, July 17, 2013

You Make My World Happy

One of my favourite MFT dies, is this gorgeous little rainbow. It's just so pretty & looks great on cards.


I also used MFT clouds & sun. I cut the clouds from white felt to give them another dimension & that look of softness you think of clouds being & I used some twine around the sun to give some more texture to the card also. The cloud at the top, I stamped the sentiment on, then used some glitter embossing powder for a bit of sparkle.

I think it should be enough to brighten someone's day & make them feel happy, don't you?!

Sunday, July 14, 2013

Have Hope

My next few cards were made using a great die cutter, another one from MFT (My Favourite Things), I started playing around with different colours & ended up with quite a pile lol

The first card was made using my favourite colour of all time, Pink!!  This one started out testing a new die, the Scattered Hearts down the right hand side, which are actually very cute & I can see them being used a lot.  I inked around the edges of the white circle & scalloped oval using a pink ink, glued on some pink ribbon to match, then finished it off by adding some rhinestones to the sentiment & middle of the bra.


The second card I made using the same Bra die cutter, made a little different.  With this one I left out the extra bits on the front & just left it all the same colour so you could see the patterned paper.  It looks totally different with the different colours.  I embossed the pink circle & used a soft velour feel ribbon to give it some depth & texture.  I also used small rhinestones on the corners & in the middle of the bow.


And the last card I made using patterned paper also, but just for the bits on the front & left the main part plain black, which made the paper stand out more.  I stamped the background of the card with a few different stamps using Versamark, just to give it a subtle effect & not to over power the background by using a coloured ink.  I also embossed the white circle to add some texture & used glitter card stock in red behind the sentiment to make it stand out a bit more & give it some sparkle.


Saturday, July 13, 2013

Baby Jack

Another card I would like to share tonight, is one I made for my new nephew all the way over in Boston.


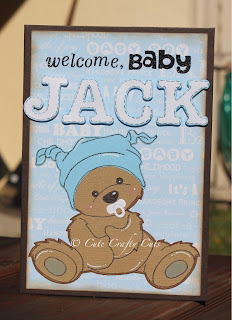
I used one of my many gorgeous little Bear die cuts called Bambino Bear & added a little dummy to make him look more baby like.  I stamped the Welcome, Baby & embossed it, then cut out letters to make his name.  On each letter I went around the edges & drew on a stitched pattern, then chalked around the edges with blue chalk to make it stand out a bit more.  Each letter is raised with a tiny foam dot & the patterned paper on the background has inked edges to give it a finished look.

Overall, very cute I thought :)

I Wheelie Like You

My very first post, how exciting!!  I may be a bit slow at this for a while until I get the hang of things.  I am hoping that I can just teach myself how to do all this along the way, so please bare with me :)

I will start by posting a few of my handmade cards & try to describe them as best I can, but if there is anything else you need to know or anything that I have forgotten to add (which I am sure will happen lol), please let me know.

My 1st card tonight was made using a My Favourite Things stamp from the Pure Innocence range (my fav) called "I Wheelie Like You"


I used Copic markers to colour her in & to make the grass.  That was the first time I had used the flick effect to get the blades of grass & I think it came out pretty well for a first attempt.  I also went around the edges with ink to give it a bit of a worn & finished edge.  The "I Wheelie Like You" is raised up a little using foam dots.  This card (if still for sale), can be purchased from my eBay store or from my Facebook page.

The 2nd card I made using the same stamp, just with different colours & with this one I paper pieced her little t-shirt & pants & drew some dirt around on the ground with a few bits of grass.


This one sold the first day I made it, so I was pretty happy :)


You will notice that I use a lot of My Favourite Things dies & stamps sets, they really are My Favourite!!