Thursday, November 21, 2013

MFT Card Sketch 151

Today I completed a card that I made following MFT Card sketch 151 which looks like this


Every week I have good intentions on completing the card sketch & just somehow run out of time before the next one is out lol  So this time, I got onto it right away!!


So this is what my card looks like


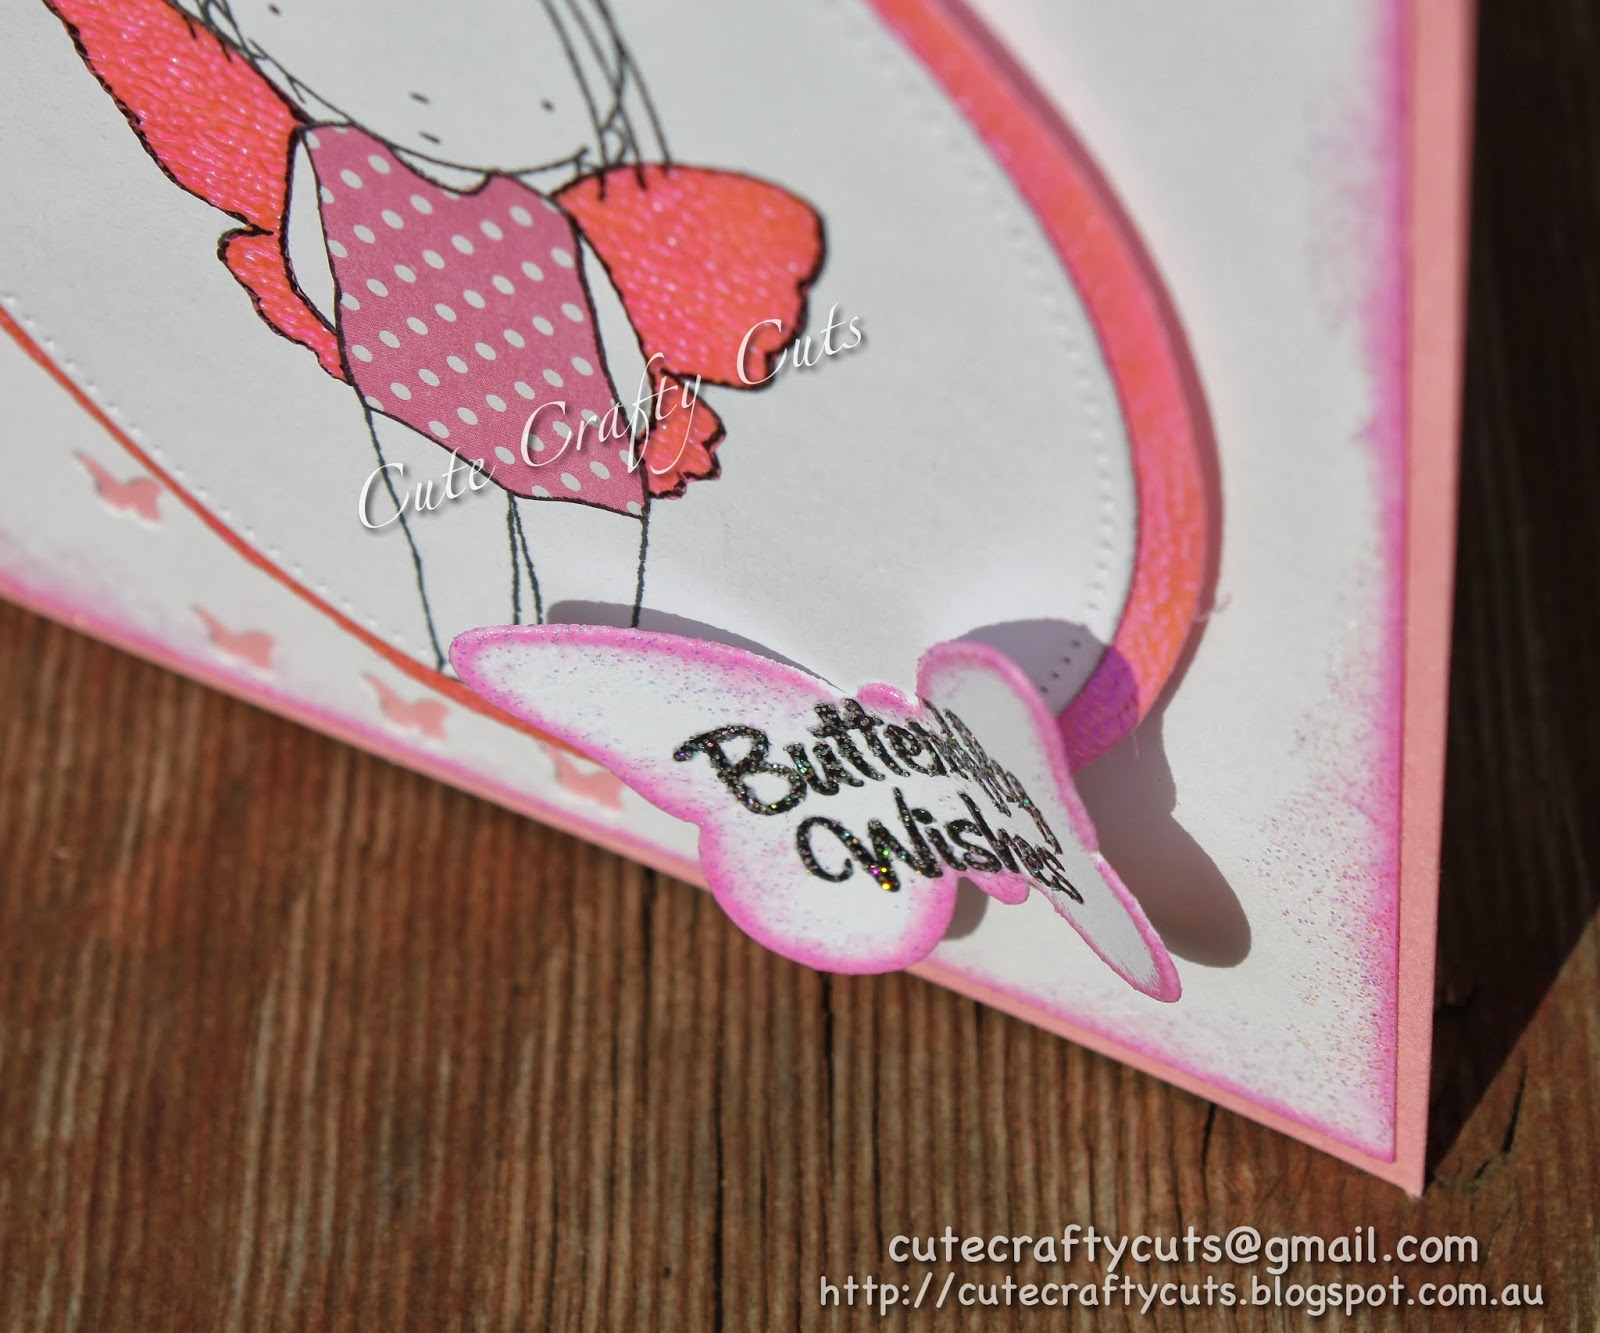
I used the gorgeous little PI stamp Butterfly Kisses from MFT that I stamped onto a circle cut from the Pierced Circle STAX.  I paper pieced her outfit with some patterned paper & the wings with a very shiny piece of wrapping paper I had.  I was going to colour her with copics, but I thought that she looked better as she is with the white background, it just gives it a nice effect without too much other colour added.  I did colour in the small flower in her hair with a hot pink, to make it stand out more.

The background was die cut using an MFT die called Flying Butterflies which are just so cute!!  I inked around the edges with VersaColor Orchid, then used a clear embossing powder that had a crystal glitter in it.  You may not be able to tell from the photo, but the edges are very sparkly & shiny.  I also did the same on the edges of the butterfly, which was cut from an MFT die set called Butterflies, a 3 piece die set.  The Butterfly Wishes is a stamp from the Winged Beauties set, which is embossed with a glitter embossing powder also.


I popped the image circle up with foam dots & glued the butterfly onto the edge & raised the wings a little to make it look like it is flying, here is a close up 


I hope you like my card & I am hoping to start following along with more MFT card sketches.  As you can see, I LOVE MFT & have lots & lots of their stamps & dies to play with  :)


Thanks for stopping by


Sunday, November 3, 2013

Hello Kitty Cards

Hi again :)  Tonight I am going to show you 2 cards I completed this weekend that are not Christmas cards!

The 1st Card I made using my Fairy Hello Kitty Sizzix die cutter.  I used some lace down the side & cut a pierced tag from MFT, punched a hole & put a small eyelet in it with some twine, then used a foam dot to make it pop off the card.


The 2nd card I used my Hello Kitty Bee Sizzix die cutter.  The grass & banner at the top were cut using MFT dies & the sentiment was also from an MFT stamp set which happened to go perfectly with this card!!  I used a couple of little flower brads I had & some paper flowers down the bottom to give it some extra colour & dimension.  The pieces of grass are bent down a bit to give it a 3D look also.


That was the 1st time I had actually used my Hello Kitty dies & I have had them for a very long time lol  I think these 2 cards turned out well & I hope you like them.

Thanks for looking :)

Copic coloured Christmas Cards

I have 2 last Christmas Cards to show you this morning that I made last week, then I am up to date with posting Christmas cards!!

The 1st one is my favourite card so far.  I am still learning how to colour with copics & it is quite frustrating when I watch all these you tube videos of people colouring & it looks so easy & then I try & it looks nothing like it should, so I think this one turned out pretty well  for one of my very first copic coloured images.  The gorgeous image is a digital image from Wee Stamps & I just love it.  After I coloured it in, I cut out a frame from a glitter paper to put around it & stamped the Merry Christmas on a die cut washi tape from MFT.  I also stamped the washi tape die cut with a little Holly stamp I had before I stamped the Merry Christmas onto it, then inked the edges just a little with a bottle green ink.


The last card I have for you is also coloured with copics & is another gorgeous little digital image, but this one is from Stampfairy.  This one was a bit of a challenge because I hadn't tried colouring white with the grey shadows & red is a very hard colour to work with.  My first image I ruined because the red ran into the white section, so I had to be very careful with my next attempt, but I think it came out pretty well in the end.

I used some mulberry paper under the image that I had wet & teared to give it the hairy edges.  The tab on the side was cut using an MFT die & the Merry Christmas stamp was also from MFT which is new & I love the writing!  I added a little bit of glitter to her bows & the present, just to give it a bit of sparkle & also added some rhinestones to the corners.  The little wooden Christmas tree on the bottom was another from my ever growing stash of craft bits & pieces lol


Thanks for looking & I hope you like my new additions :)

3 Christmas Cards

Good morning everyone :)  Today I have a few more Christmas cards to show you that I had actually done a few weeks ago.

The 1st one I made using the cute Daii Dragon, cut from a custom made die cutter that I have in my collection.  I love this die cut, as you can make it hold just about anything depending on the card you are making, so for my Christmas Card, I have him holding a stocking & I also added a Santa hat.


The 2nd card I made using the gorgeous Carla Bear & the pretty swirly die cut in the background was cut from an MFT die which is so pretty.  I cut it in a shiny silver card, but it is a little hard to tell from the photo.  The little stocking in the bottom corner is a wooden shape I have had for many many years hidden away, it's time to start using everything I have been collecting!


The 3rd card I am showing you today is using one of my favourites, Jodie Bear.  I have also used the same swirly MFT die in the background, but this time I cut it from a green glitter card stock.  The star strip on the left was also cut using an MFT die, then I wrapped some twine around it & added a little red bow.


I hope you like my cards this morning & I hope you all have a great day (or night).
Thanks for looking :)